

Smart Outdoor Cam 360 Prime


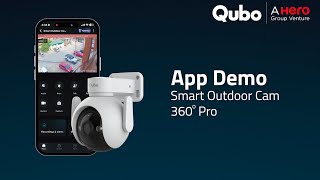
App Controls
To turn the flashlight on or off, please click on Flashlight icon on the control panel below the live camera view. When Flashlight is turned on, Flashlight icon will be highlighted. Please note that the Flashlight will stay turned on for 3 minutes only at a time. If flashlight icon is not visible, please click on bottom arrow to expand the control panel to see all controls.
To turn the siren on or off, please click on Siren icon on the control panel below the live camera view. When Siren is turned on, Siren icon will be highlighted. Please note that the siren will stay turned on for 30 seconds only at a time. If siren icon is not visible, please click on bottom arrow to expand the control panel to see all controls.
To rotate your camera, please click on Rotate icon in the control panel below the live camera view. Please note this control is only visible if your camera supports rotation via App. Navigate to live camera feed from Qubo App home screen and click on Rotate to turn your camera.
To enable privacy mode, go to your camera settings by clicking the 3 dots on top right of the live camera view. Use the on and off toggle to enable or disable privacy mode.
To fast forward within a past recording, navigate to past recordings by clicking on recordings & alerts on your camera screen. Tap on the screen to view screen controls and click on viewing speed 1x to toggle between 1x, 2x, 4x speeds. You can also double tap to skip forward.
To view past recordings, click on recordings & alerts on your camera screen. Recording of current date will be displayed and you can click on Today to open calendar and select past dates. Please note cloud recordings are saved for upto 28 days depending on your plan while a 64 Gb microSD card can typically store 3-7 day continuous footage depending on selected resolution for recording.
To record video, please click on record icon on the control panel below the live camera view. When recording is ongoing, record icon will be highlighted and timer will continue. Click on Stop icon to stop recording. Recordings are saved on your smart phone and can be accessed via Qubo App Gallery.
Recordings & captured images are saved on your smart phone and can be accessed via Qubo App Gallery. Click on the gallery icon on your live camera screen and browse recorded videos & images.
Wi-Fi Connectivity
Please click on the Wi-Fi icon on top left of the live camera view to see signal strength. Please note that Wi-Fi signal strength is measured in negative dbm values and if your strength is less than -60 dbm, you will need to adjust the router position or get a Wi-Fi extender or Mesh Wi-Fi system to boost signal. While Smart Cameras need less than 5 Mb upload & download speeds, walls — especially exterior home walls — drop Wi-Fi signal strength. Cameras with weak signal may face intermittent connectivity issues.
If you observe low Wi-Fi signal strength, you can opt for an affordable 2.4 Ghz Router & Repeater to boost signal strength of camera primarily or opt for a dual band mesh Wi-Fi system that you can also use for day-to-day browsing internet, streaming videos & work. During setup of Wi-Fi extender or Mesh Wi-Fi, you will have an option of keeping the same name & password as home network or creating a new one. Once setup, please update Wi-Fi network of your camera in case you have chosen a different network name and re-check Wi-Fi signal strength of your camera again in 15 min. If setup is working, you will see an increase in dbm value.
Please note while 5 GHz band has high speed, it has short range and is not ideal for connected devices. All Qubo connected devices support 2.4 Ghz Wi-Fi for long range connectivity. Always connect Qubo cameras on 2.4 GHz network which is provided by default by all internet providers.
To change Wi-Fi network, navigate to Settings > Update Wi-Fi and follow instructions in-App. You will be guided to long press (5-10 seconds) the reset button as first step.
To reset Wi-Fi camera, first remove the camera by navigating to Settings > Remove Device by clicking on 3 dots at top right of camera screen. Then go to home page, select add-device and follow instructions in-App. You will be guided to long press (10 seconds) the reset button as first step.
Firstly, check if camera LED is on to ensure camera is getting power. If LED is not turning red or green and camera power socket works for other devices, please raise a request for replacement. Secondly, if camera LED is on but camera is not connected – please restart your camera and router. Thirdly, repeat step 2 but this time bring camera next to router to rule out any challenges due to Wi-Fi range which require an extender or mesh.
If the camera still doesn’t work, please raise a ticket for camera replacement. Above steps are helpful if you live in an area experiencing power surges, power / Wi-Fi outages or live in large homes.
Firstly, check if these are rare instances or regular instances. We have observed outages at internet provider end leading to intermittent issues, but rarely. Secondly, monitor camera performance for 15 min when no other devices are consuming router band-width for video streaming, work or games. We have observed internet plan above 100 Mbps speed provide seamless experience. Thirdly, bring your camera closer to Wi-Fi router and monitor for 15 min to assess any distance issues that can be resolved by a Wi-Fi extender or Mesh system.
If the camera still doesn’t work, please raise a ticket for camera replacement. Above steps are helpful if you live in an area experiencing power surges, power / Wi-Fi outages or live in large homes.
Storage & Playback
Yes. You can view the live stream and use the live camera feed app controls like audio, talk, siren etc. However, to view past recordings, an SD card or a premium AI guard plan is required.
Qubo offers industry leading cloud storage solution - with upto 28 days cloud back-up option and plans starting from Rs. 149/ month. You only need 1 plan for multiple devices. Select Shield icon on top right of your camera screen to view & compare plans. Select a plan that meets your needs and once enabled, you can view past recordings in recordings & alerts section.
With cloud back-up, your footage is safe from theft or corruption, streams faster and is available from anywhere.
CCTV surveillance requires high endurance as read and write operations happen continuously and at high speed. A C10, V30 or U3 microSD card from an authorized seller is recommended for storage. MicroSD cards from unauthorized sellers or A1 microSD cards have found to be prone to data corruption & in-compatible with cameras having firmware built in India. Rotate the camera lens part in the upward direction to access the microSD card slot. Insert microSD card and let camera automatically check reformat microSD card if needed and reset device. Please wait for 15 minutes before checking Recordings & Alerts section of your camera for past recordings.
First, go to recordings & alerts section and your configured storage option. To go to a specific time or event, you can drag on the timeline scrubber or click the relevant alert to go to that event. You also have option to fast forward by selecting from top right of the screen or tap repeatedly on the right or left of the screen to skip forward like a YouTube video.
Qubo cameras are designed to provide you with long range relevant footage with past recordings of periods when activity is detected; motion or person – depending on your preference. In case you require 24x7 recorded footage irrespective of any events, you will need to use a microSD card. Once microSD card is setup, go to Settings > Recordings & Notifications by clicking on 3 dots on top right of live view screen. Ensure Continuous Recording option is turned on.
To format your microSD card, navigate to Settings > Storage by clicking on the 3 dots on top right of your live camera screen. Select format SD card and confirm to format microSD card. Please note microSD card is formatted initially because CCTV camera encodes video into an mpeg4 stream which requires camera to serially store data on microSD card.
Firstly, check if microSD card is inserted properly. While inserting you will feel a click when microSD card is inserted. Navigate to Settings > Storage to see if any SD card is detected by device. Secondly, reboot device and again navigate to Settings > Storage to see if any SD card is detected by device. Thirdly, test the microSD card on any other device like tablet or laptop to check if microSD card is working or a replacement is required.
If SD card still doesn’t work, please raise a ticket for camera replacement. Above steps are helpful if you live in an area experiencing power surges, power or Wi-Fi outages or if you are using incompatible microSD cards which are prone to corruption.
Firstly, format the microSD by navigating to Settings > Storage by clicking on 3 dots at top right of the live camera screen. Secondly, try re-inserting the SD card and check after 15 min if recording resumes. Let the camera automatically detect, format and setup microSD card after reinserting. Thirdly, try to reboot device and check after 15 min if recording resumes. Let the camera automatically detect, format and setup microSD card after rebooting.
If SD card still doesn’t work, please raise a ticket for camera replacement. Above steps are helpful if you live in an area experiencing power surges, power or Wi-Fi outages or if you are using incompatible microSD cards which are prone to corruption.
Display & Alerts
To change resolution of live view, please click on Resolution icon on the control panel below the live camera view. By default, resolution is optimized to ensure faster loading and lag free streaming even in low network. If you have good signal strength, you can boost resolution for sharper clarity.
To configure night vision, navigate to Settings > Night View by clicking on the 3 dots on top right of your live camera screen. Select Black & White for a sharper view and Color for colored imaged in low light continuously. In default auto mode, color is automatically turned on along with flashlight when motion / person detected and stays black & white rest of the time.
Navigate to Settings > Recording & Notifications by clicking on 3 dots on top right of your camera screen. You can choose to be alerted in case of a person detection or motion detection. Select Qubo’s proprietary AI person detection for best performance which has rare instances of false alerts. With motion detection, false alerts might happen due to sudden lighting changes, shadows / reflection or movement in curtains / plants. Tuning motion sensitivity to low or medium sensitivity can help reduce irrelevant alerts with motion detection.
Firstly, try to kill apps not in use and re-launch Qubo app on your smartphone. When smartphone memory is occupied with multiple Apps, it may lead to performance issues. If loading speed is still slow, please ensure you have the latest version of Qubo App by checking Playstore/ App store. Qubo’s R&D team continuously releases App improvements for better customer experience. If issue is still not resolved and camera & smartphone internet is working fine, please raise a ticket via Help & Support section from the Qubo App.
If you are using person detection, we have found false alerts to be rare occurrence. If you are facing frequent issues with person detection, please raise a ticket to help us understand your scenario. If you use motion detection, false alerts might happen due to sudden lighting changes, shadows / reflection or movement in curtains / plants. Navigate to Settings > Recording & Notifications by clicking on 3 dots on top right of your camera screen and select low or medium sensitivity for motion detection.
Please note you can also setup Zones to detect not within the complete field of view of camera but specific areas only. This helps remove irrelevant areas, specially if they generate incorrect alerts.
Smart Features
When you click on Rotate icon on the control panel below the live camera view, you will have an option to save the current position of camera by clicking on save icon on right above the movement controls. You can also go to preset section and select an earlier saved preset position to move the camera orientation to.
To enable motion tracking, navigate to Settings > Recording & Notifications by clicking on 3 dots on top right of your camera screen. Toggle motion tracking on – when person is detected, the camera will track person while person is in field of view and then return to original location.
Go to gallery to view saved recordings & select the recording you want to share. Click on share icon the top right of your screen to share.
You can choose to save a live event to gallery or you may also download an alert you are viewing by clicking on the download icon below playback.
To connect to Amazon Alexa, go to Works with Alexa in your camera settings and log into your Amazon account and follow steps to view camera on Alexa Echo. To setup Google Assistant, open the Google Assistant App and add Qubo devices under skill option.
Firstly ensure, audio is enabled and the icon is highlighted to listen to audio. Secondly, check that there are no obstructions near the mic & speaker of camera. If the audio is still not working as expected, please once check if audio improves with another smartphone. If the problem persists, please raise a support ticket.
Firstly, try any other controls like flashlight or capture to ensure App is connected to camera. Then try to gently rotate the camera by your hand. If you feel high resistance or movement is stuck, dust may have accumulated. Try to clear dust by gently rotating the camera by hand 8-10 times. If the issue persists, please raise a support ticket.
Technical
No, it is not included. You need to purchase it separately.
Rotate the camera lens part in the upward direction. You will find the microSD card slot there.
Open camera live footage & go to settings > About Device.
Qubo offers upto 28 days backup basis your subscription plan.
Smart Outdoor Cam 360 Prime requires a 5V 1A power supply.
Yes, it is IP66 rated—water and dustproof.
No, it requires consistent power supply via adapter.
Yes, it has siren control on the app along with flashlight for outdoor use.

